
Everything involved in hooking a monitor up to a Windows or Mac laptop: the right cable, the settings that matter and the fixes for a screen that stays dark.
This guide is general information, not technical or legal advice. If you’ve lost money or personal information, contact your bank, IDCARE on 1800 595 160, or report it through ReportCyber at cyber.gov.au.
Quick summary
- Check your laptop’s ports before buying anything: HDMI, DisplayPort, USB-C and older VGA or DVI each need a matching cable, and some USB-C ports carry video while others only charge.
- Microsoft recommends an HDMI cable rated version 2.0 or a DisplayPort cable rated 1.2, no longer than 1.8 metres, and the shortest cable that reaches.
- On Windows, press the Windows logo key + P to switch between duplicate, extend and second screen only; on a Mac, use System Settings, then Displays.
- A blank screen is usually a cable, adapter or port problem, and a splitter can only duplicate a signal, never extend it to two independent displays.
- Update Windows before connecting a monitor, because out-of-date software is a common reason an external display refuses to cooperate.
A second screen turns a cramped laptop into a proper workstation, with your inbox on one display and the document you are actually working on in front of you. The job is straightforward once you know which cable your laptop needs and which settings to change. This walkthrough covers Windows and Mac laptops, from picking a cable to fixing the blank screens and flicker that sometimes get in the way.
Why a second screen helps when you work from home
Working from a laptop screen alone means constant window shuffling: you jump from a video call to a spreadsheet to a browser tab and lose your place each time. An extended display gives each task its own space, so you can read notes on one screen while typing on the other.
Windows suits this rhythm well. When you undock the laptop, windows on the external monitor are minimised, and when you reconnect, Windows puts everything back where you had it. You can even connect some displays wirelessly with an adapter, but a cable is the dependable choice for everyday work, for much the same reason a wired connection beats Wi-Fi in a home office.
What you need before you start
Before changing any display settings, make sure the software side is current. On Windows, select Start, search for Settings, then open Windows Update and select Check for updates. Microsoft recommends updating before setting up external displays, and out-of-date software is a common reason monitors refuse to cooperate. If you keep postponing updates, our walkthrough of why software updates matter shows how to get them installed without much fuss.
You will also need an external monitor with its power cable, a video cable that fits a port on both the laptop and the monitor, and an adapter if the ports don’t match.
Step 1: Check your laptop’s ports and pick the right cable
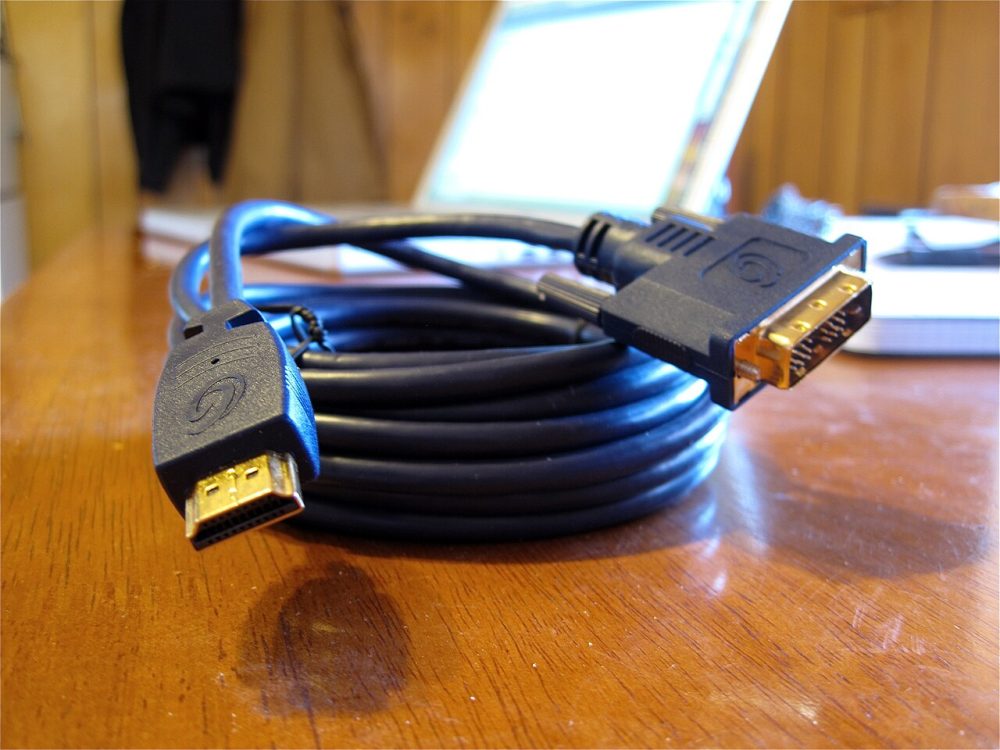
Look at the sides and back of your laptop for HDMI, DisplayPort, USB-C or Thunderbolt ports, and VGA or DVI ports on older models. The connector types can look similar at a glance, so work out exactly what you have before buying anything. Check the back of the monitor too, because the cable has to fit both ends.
USB-C deserves a specific check. Some laptops can send video through the port and some use it for charging only, so confirm yours supports video output before you buy a USB-C cable or dock.
Longer is not better with video cables. Microsoft recommends an HDMI cable rated version 2.0, or a DisplayPort cable rated 1.2, no more than 1.8 metres long, because overly long cables can cause a loss of image or sound. Use the shortest one that reaches your desk. If the ports don’t match and you need an adapter, Microsoft ranks the types by likely results, in this order: USB-C, DisplayPort, HDMI, DVI, VGA.
Handy tip
Check that your laptop’s USB-C port supports video output (DisplayPort Alternate Mode) and not just charging before buying a cable or dock. A charging-only port leaves you with a dark screen.
Step 2: Connect the monitor
Plug the monitor into power, connect the video cable at both ends and switch the monitor on. A Mac detects the display automatically once it has power and a working connection, and the desktop appears on the new screen. On a Mac laptop with Apple silicon, the first connection may prompt you to allow the accessory to connect; if you decline, the display stays dark.
Windows usually picks up the monitor on its own. If nothing appears, go to Start > Settings > System > Display, open Multiple displays and select Detect. For a wireless display, press the Windows key and K together to open Cast, then select the adapter.
Step 3: Choose duplicate, extend or second screen only
On Windows, press the Windows logo key + P and pick a mode:
- PC screen only: the external display switches off.
- Duplicate: the monitor mirrors the laptop screen, which is the default when you first connect one. Handy for showing something to someone across the desk.
- Extend: the monitor becomes a second desktop, which suits most home workers.
- Second screen only: the laptop display switches off, useful with the lid closed and an external keyboard attached.
On a Mac, open System Settings (or System Preferences on older versions) and click Displays, then choose to mirror or extend. If the monitor is not made by Apple, some settings live in its own menu rather than in macOS.
Step 4: Arrange the displays and set resolution, scaling and refresh rate
In Windows Display settings, select Identify and a number appears briefly on each screen so you know which is which. Drag the numbered displays to match their physical positions, select Apply, then test by moving your mouse across both screens; the pointer should cross exactly where the monitors sit on your desk.
macOS keeps this in the same spot: System Settings, then Displays, where you can arrange displays, change resolution and pick a refresh rate. Your Mac applies the best settings automatically for a connected display. If you connect two or more, connect the highest-resolution display first, because how many displays a Mac supports, and at what quality, depends on the model, the displays and the cables.
Give scaling a quick check as well. A display pushed beyond what the cable, adapter or laptop supports will show a dark screen or run below its best quality, so if text looks blurry, open the display settings and try the recommended options.
Step 5: Position the screen for comfort
Place the external monitor directly in front of you and raise it so you look straight ahead at the screen rather than down at it. A stand, a monitor arm or a stack of books will do. Keep it far enough away that you read text without leaning forward. If the laptop screen is your second display, park it to the side and attach an external keyboard and mouse. On a Mac laptop with the lid closed, the Mac must be connected to power and using an external keyboard and mouse.
Fixing a blank, flickering or undetected monitor
When the screen stays blank, start with the physical basics before blaming the software.
On Windows:
- Press the Windows logo key + P and make sure Extend is selected, since the mode sometimes flips on its own.
- Check the cable is secure at both ends, then swap in a different cable. If the new one works, the old one was faulty.
- Try a different video output port if the laptop has more than one, or try the monitor with a different computer to work out which part is failing.
- Treat flicker and dropouts as cable problems first. A charging-only USB-C cable can’t drive a monitor reliably, so use certified cables and skip adapters you don’t need.
Two limits are worth knowing. A splitter that feeds two monitors from one port will only duplicate the same image on both, never extend, because it repeats one signal rather than creating two independent ones. And some laptops’ graphics hardware can’t drive more than one external monitor at all, so check with the manufacturer if a second display refuses to appear.
If two monitors worked yesterday but only one appears after the laptop woke from sleep, press Windows logo key + P to set the mode again, because the configuration can revert after standby. For a stubborn case, shut the laptop down completely, hold the power button for 15 to 20 seconds, connect one monitor, and start it up.
On a Mac, check the power and video cables at each end first. If the display is connected through a hub or dock, plug it into a port on the Mac itself instead. Put the Mac to sleep and wake it, closing and reopening the lid on a laptop. If it is still not detected, open Displays in System Settings, press and hold the Option key to reveal the Detect Displays button, then click it. A restart is the last resort; if the Mac will not restart normally, hold its power button for about 10 seconds to shut it down, then press it again to start up. Adapters matter here too: a USB-C adapter must comply with DisplayPort Alt Mode, Thunderbolt 3 or Thunderbolt 4 to carry video.
Once the on-screen layout matches the desk and the settings hold after a reconnect, plug the cable in before your next workday starts and give the extended setup a full day of real work.
Your questions answered
Q: Why won’t my laptop detect the second monitor?
A: Start with the cable: make sure it is secure at both ends, then try a different cable or a different port. On Windows, use Detect in Display settings; on a Mac, hold the Option key in Displays settings to reveal Detect Displays.
Q: Can I use a splitter to run two external monitors?
A: No. Microsoft notes that a splitter duplicates the same signal on both monitors rather than creating two independent ones, so you cannot extend across them. You generally need a second video output port or a dock.
Q: Can I close the laptop lid and just use the external monitor?
A: On Windows, choose Second screen only with the Windows logo key + P. On a Mac laptop with the lid closed, the Mac must be connected to power and using an external keyboard and mouse.
Q: How long can my monitor cable be?
A: Microsoft recommends no more than 1.8 metres for HDMI or DisplayPort cables, because overly long cables can cause a loss of image or sound. Use the shortest cable that comfortably reaches your desk.